A well-maintained strimmer is a garden warrior, effortlessly tackling overgrown grass and weeds. Regular upkeep ensures peak performance, longevity, and a tidy yard. Among the vital components, strimmer wire is a linchpin, facilitating the tool’s cutting prowess. This blog on how to replace strimmer wire delves into this unassuming component’s crucial role in its functionality. Join us as we explore the significance of maintaining a finely tuned strimmer and understand why addressing the strimmer wire’s condition is critical to achieving pristine results in your lawn care routine.
Understanding Strimmer Wire
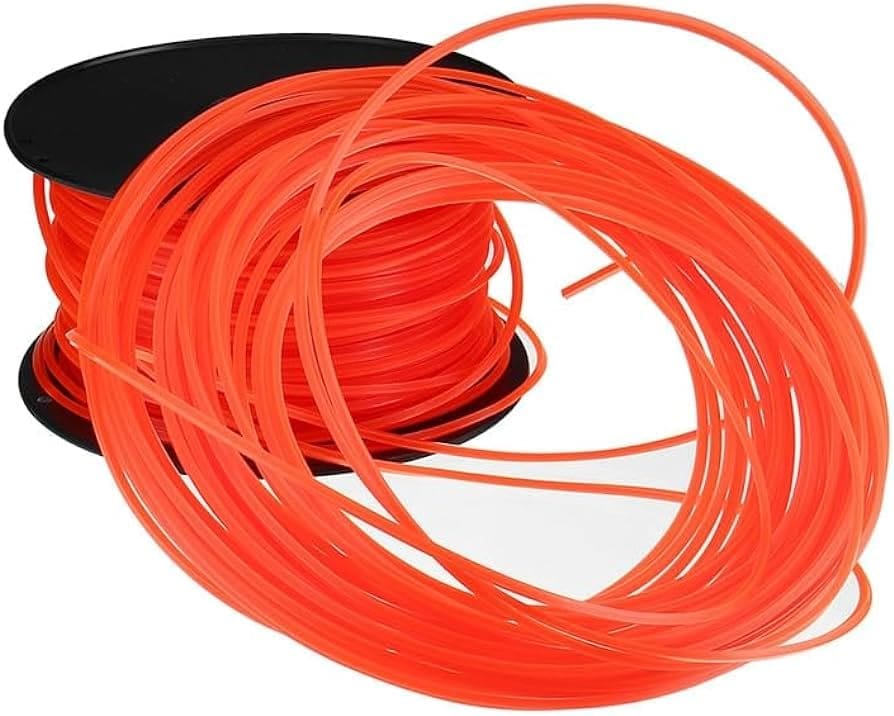
Strimmer wire, a small but mighty component in your garden arsenal, is essential for efficient lawn maintenance. Also known as the trimmer line, this robust filament comes in various materials and thicknesses, each tailored to specific cutting tasks. Nylon and other polymers dominate the market, ensuring flexibility and durability. Understanding the nuances of strimmer wire types empowers users to choose the fit for their needs. Whether battling dense vegetation or grooming a delicate lawn edge, the suitable strimmer wire is the key to achieving a precise and polished finish in your landscaping endeavours.
Signs It’s Time To Replace Your Strimmer’s Wire
Recognizing the signs that it’s time to replace your strimmer wire is crucial for maintaining optimal performance in your lawn care routine. Here are key indicators that your strimmer wire may need attention:
- Reduced Cutting Efficiency: If you notice a decline in your strimmer’s ability to cut through grass and weeds cleanly, it might be a sign that the wire is worn or damaged.
- Frequent Breakage: Constant breakage of the strimmer wire, despite proper usage, suggests that it has reached the end of its lifespan and needs replacement.
- Uneven Trimming: Uneven cutting or leaving patches of untrimmed grass indicates an issue with the strimmer wire’s effectiveness.
- Visible Wear and Tear: Inspect the strimmer wire regularly. If you observe fraying, nicks, or signs of wear, it’s a clear signal that replacement is imminent.
- Strange Noises: Unusual sounds during operation, such as a high-pitched whining or rattling, can indicate that the strimmer wire is not functioning optimally.
Recognizing these signs promptly allows you to address the issue before it hampers your strimmer’s performance. Stay tuned for our upcoming guide on “How to Replace Strimmer Wire” for a seamless and efficient replacement process.
Step-By-Step Guide On How To Replace Strimmer Wire
Embarking on replacing your strimmer wire might seem daunting, but fear not – we’ve got you covered with a straightforward step-by-step guide. Follow these easy instructions to ensure a seamless replacement process:
Step 1: Safety First
Before diving in, don your safety gear – gloves and safety glasses – to protect yourself from any potential hazards during the replacement.
Step 2: Power Off
Ensure your strimmer is powered off and unplugged. For gas-powered models, disconnect the spark plug wire to prevent accidental starts.
Step 3: Remove the Strimmer Head Cover
Use a hex key or screwdriver to remove the cover protecting the strimmer head per your strimmer’s design. Set the cover aside for reassembly later.
Step 4: Remove Old Strimmer Wire
Carefully unwind and remove the old strimmer wire. Dispose of it in an environmentally friendly manner.
Step 5: Measure and Cut New Wire
Refer to your strimmer’s manual to determine the length of the new strimmer wire. Use wire cutters or scissors to trim it accordingly.
Step 6: Feed New Wire Through the Strimmer Head
Locate the entry point for the strimmer wire on the strimmer head. Feed the new wire through this point until it emerges from the other side.
Step 7: Secure the Strimmer Wire
Follow your strimmer’s manual to secure the new wire in place. This might involve winding the wire around the spool or securing it in designated slots.
Step 8: Replace the Strimmer Head Cover
Carefully place the strimmer head cover back in position and secure it using the hex key or screwdriver.
Step 9: Test the Strimmer
Power on the strimmer and test it quickly to ensure the new wire functions correctly. Adjust the wire length if necessary.
Congratulations! You’ve successfully replaced your strimmer wire. Following this step-by-step guide, keep your strimmer in top-notch condition, ready to tackle unruly grass and weeds easily. Stay tuned for more tips on maintaining your garden tools.
Tips For Efficient Strimmer Wire Replacement
Efficient strimmer wire replacement ensures a well-maintained garden tool and saves you time and effort in the long run. Here are some valuable tips to streamline the process:
- Choose the Right Strimmer Wire: Ensure you select the appropriate type and thickness for your specific strimmer model and the tasks. Consult your strimmer’s manual for guidance.
- Pre-cut Strimmer Wire: Before beginning the replacement, pre-cut the strimmer wire to the recommended length. This minimizes interruptions during the process and ensures a smoother replacement.
- Keep Tools Organized: Arrange your tools and materials organized before starting. This prevents unnecessary delays and frustration while searching for essential items during the replacement.
- Follow the Manual: Refer to your strimmer’s manual for manufacturer-specific instructions. Each model may have unique features or steps, and following the manual ensures a precise replacement process.
- Wear Safety Gear: Prioritize safety by wearing gloves and safety glasses. Strimmer wire replacement involves handling sharp edges and materials; protective gear helps prevent accidents.
- Work in a Well-lit Area: Adequate lighting is crucial for a detailed and accurate replacement. Choose a well-lit workspace to ensure you can see and handle the components effectively.
- Regularly Inspect and Clean: Incorporate regular inspections into your maintenance routine. Check the condition of the strimmer wire and clean the strimmer head to prevent unnecessary wear and tear.
- Maintain Tension: While replacing the strimmer wire, maintain proper tension. Follow the manufacturer’s guidelines to ensure the wire is securely fitted, preventing issues during operation.
- Use Quality Strimmer Wire: Invest in high-quality strimmer wire to enhance durability and cutting performance. Quality wire reduces the frequency of replacements and ensures consistent results.
- Replace Both Lines Simultaneously: If your strimmer utilizes a dual-line system, consider replacing both lines simultaneously. This promotes balanced performance and prevents uneven wear.
Efficient strimmer wire replacement is not just about the task but is an integral part of overall garden tool maintenance. By following these tips, you’ll not only extend the life of your strimmer but also optimize its performance for a pristine lawn. Stay tuned for more insights into maintaining your garden tools effortlessly.
Troubleshooting Common Issues
While replacing strimmer wire is a straightforward task, encountering common issues during the process is not uncommon. Here’s a troubleshooting guide to help you address these challenges and ensure a smooth replacement:
Difficulty in Removing the Strimmer Head Cover:
- Solution: Apply a penetrating oil to loosen any stuck screws. If using a hex key, ensure it fits snugly to prevent slippage. Patience and a gentle touch are essential.
Uneven Line Feeding:
- Issue: The strimmer wire doesn’t feed evenly, leading to uneven cutting.
- Solution: Check for tangles or snags in the strimmer wire. Ensure the replacement wire is appropriately wound around the spool, following the manufacturer’s guidelines.
Premature Wear of Strimmer Wire:
- Issue: The new strimmer wire wears out quickly.
- Solution: Double-check the wire thickness – using the correct gauge for your strimmer and the tasks at hand is crucial. Avoid forcing the strimmer into dense vegetation, which can cause unnecessary wear.
Wire Breakage Issues:
- Issue: The strimmer wire breaks frequently during use.
- Solution: Examine the line for signs of damage, such as fraying or nicks. Adjust the cutting height to prevent the strimmer from hitting hard surfaces, reducing the likelihood of breakage.
Difficulty in Securing the Strimmer Wire:
- Issue: The strimmer wire doesn’t stay securely in place.
- Solution: Follow the manufacturer’s instructions carefully when securing the strimmer wire. Ensure it is correctly threaded through the designated channels or spools.
Strimmer Motor Stalls or Overheats:
- Issue: The strimmer motor stalls or overheats during operation.
- Solution: Check for obstructions in the strimmer head that may impede rotation. Ensure the replacement strimmer wire is thick enough to cause a strain on the motor.
Inconsistent Cutting Performance:
- Issue: The strimmer cuts unevenly or leaves patches of untrimmed grass.
- Solution: Adjust the cutting height to the recommended level for your lawn. Inspect the strimmer wire for any irregularities and replace it if necessary.
Excessive Vibration:
- Issue: The strimmer vibrates excessively during use.
- Solution: Inspect the strimmer head for balance and symmetry. Unevenly wound strimmer wire can cause vibrations – recheck the winding for uniformity.
By troubleshooting these common issues, you’ll be better equipped to handle any challenges that may arise during the strimmer wire replacement process. If problems persist, consult your strimmer’s manual or seek assistance from the manufacturer’s customer support for more personalized guidance. Stay tuned for more tips on maintaining your garden tools effectively.
Final Words
Mastering the art of strimmer wire replacement is a gateway to a well-groomed garden. Key takeaways include selecting the suitable wire, meticulous installation, and troubleshooting common issues. Regular mail highlighted this guide, which emerges as regular maintenance of the linchpin to sustained strimmer efficiency. By performing routine checks and timely replacements, you not only extend the life of your strimmer but also ensure it operates at peak performance, effortlessly transforming your outdoor space. Embrace the simplicity of strimmer maintenance, and your garden will thank you with lush, neatly trimmed greenery. Make it a habit, and let your strimmer become the reliable companion it was meant to be.